nikon coolpix operating instructions

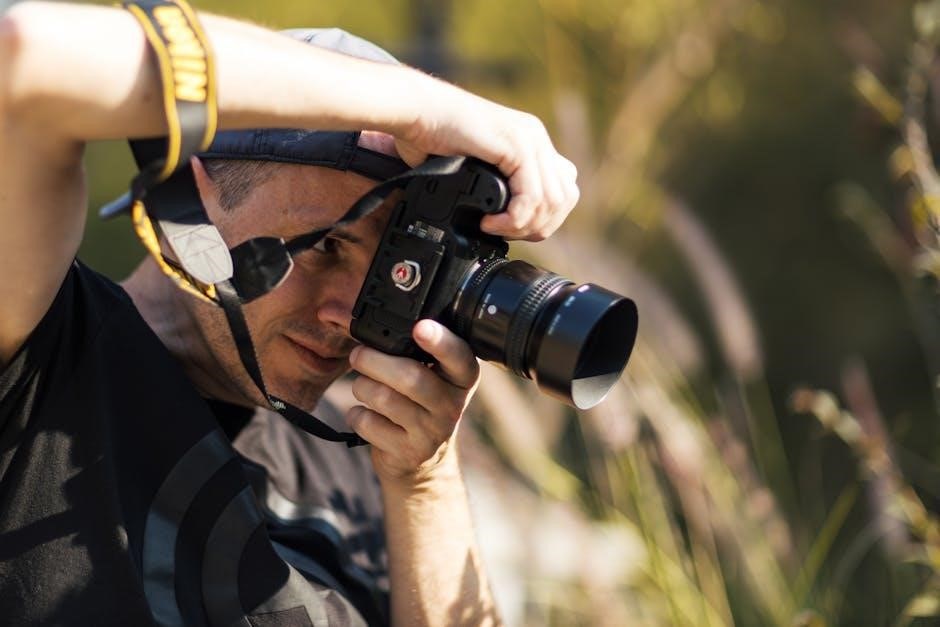
Welcome! This guide provides essential nikon coolpix operating instructions‚ ensuring you quickly grasp the camera’s features and begin capturing stunning photos and videos effortlessly.
Nikon’s COOLPIX series delivers exceptional image quality and user-friendly operation‚ making it ideal for both beginners and experienced photographers.
This manual will walk you through setup‚ basic functions‚ and advanced shooting modes‚ maximizing your creative potential with your new digital camera.
Remember to download ViewNX-i software for seamless image transfer and organization‚ enhancing your overall photography workflow and enjoyment.
What’s in the Box?
Upon opening your new Nikon COOLPIX package‚ carefully verify that all components are present. Typically‚ you should find the Nikon COOLPIX digital camera itself‚ along with this Quick Start Guide to aid in initial setup and nikon coolpix operating instructions.
A USB cable is included for connecting your camera to a computer‚ enabling file transfer and potential charging. Please note‚ a crucial component – the memory card (SD‚ SDHC‚ or SDXC) – is not included and must be purchased separately. This card is essential for storing your precious photos and videos.
You’ll also receive documentation regarding warranty information and safety precautions. Finally‚ check for any bundled accessories like a strap to securely carry your camera. Retain the original packaging for potential warranty claims or resale purposes. Ensure all items are accounted for to fully enjoy your new camera!
Important Safety Precautions
To ensure safe and enjoyable use of your Nikon COOLPIX‚ adhering to these precautions is vital. Avoid exposing the camera to extreme temperatures‚ humidity‚ or direct sunlight for extended periods‚ as this can cause damage. Never attempt to disassemble or repair the camera yourself; contact Nikon’s technical support for assistance regarding nikon coolpix operating instructions and maintenance.
When using the camera outdoors‚ protect it from rain and dust. Do not look directly into the lens when the flash fires‚ as this could harm your eyes. Always handle the battery with care‚ avoiding short circuits or exposure to fire.
Keep the camera and accessories out of reach of small children. Follow all local regulations regarding the use of electronic devices in public places. Regularly check the battery and memory card for any signs of damage. Prioritize safety for optimal performance!

Camera Overview: Parts Identification
Familiarize yourself with key components! Understanding the location of buttons‚ dials‚ the lens‚ and the LCD screen is crucial for effective nikon coolpix operating instructions.
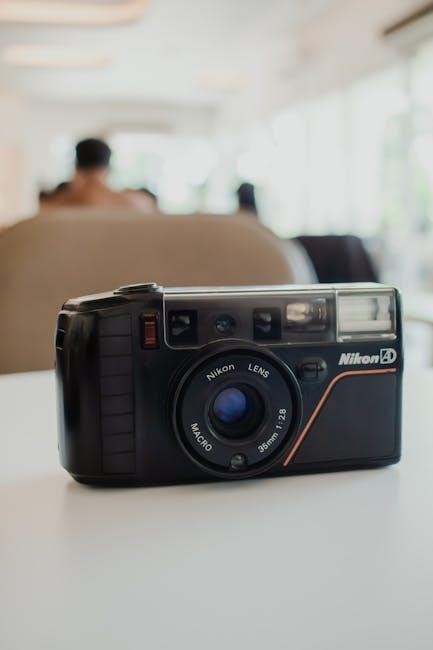
Front of the Camera
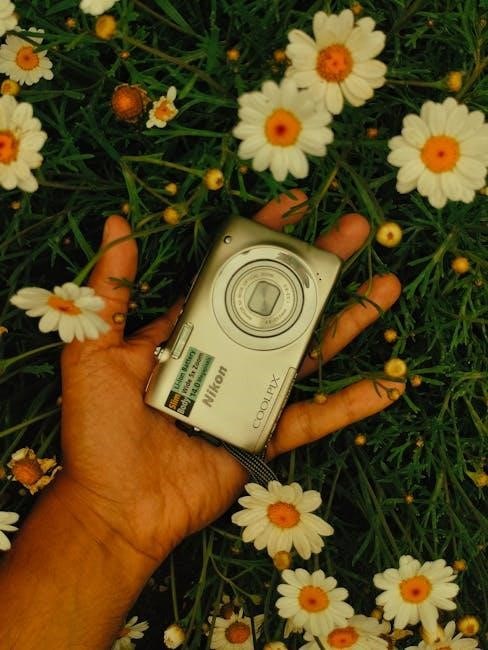
The front of your Nikon Coolpix houses several important elements for capturing images. Primarily‚ you’ll find the Nikkor lens‚ responsible for focusing light onto the image sensor. Note the lens specifications‚ such as 6.3-31.4mm or 6.3-18.9mm‚ indicating the zoom range.
Observe the zoom lever surrounding the lens barrel; this controls optical zoom‚ providing magnification without significant image quality loss. Be mindful of digital zoom‚ which can reduce clarity.
Some models feature an assist lamp‚ aiding focusing in low-light conditions. Additionally‚ you might find the flash unit positioned on the front‚ providing illumination when needed. Understanding these components is fundamental to following nikon coolpix operating instructions and achieving optimal results.
Carefully protect the lens from scratches and dust.
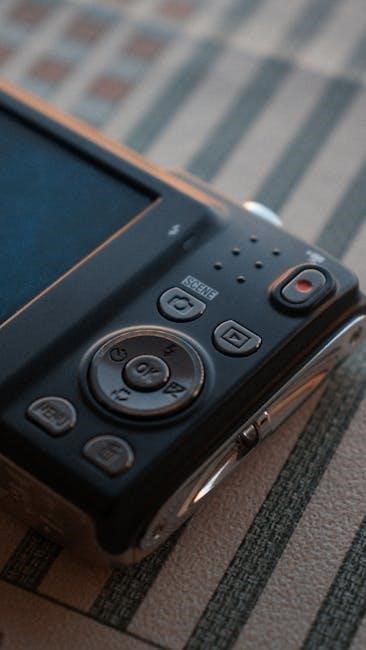
Back of the Camera
The back of your Nikon Coolpix is dominated by the large LCD screen‚ used for composing shots‚ reviewing images‚ and navigating menus. Below the screen‚ you’ll typically find a multi-directional controller pad‚ enabling menu navigation and setting adjustments – crucial for following nikon coolpix operating instructions.
A dedicated button often activates playback mode‚ allowing you to view captured photos and videos. Look for a function button (often labeled ‘Fn’) providing quick access to frequently used settings.
The shutter button initiates image capture‚ while nearby buttons control features like zoom and display settings. Understanding the layout of these controls is essential for efficient operation. Remember that a memory card (SD‚ SDHC‚ or SDXC) is required for storing your images‚ but is not included.
Top of the Camera
The top of your Nikon Coolpix houses the primary controls for shooting. A prominent power button initiates and terminates camera operation – a fundamental step in nikon coolpix operating instructions. Adjacent to this‚ you’ll find the shutter button‚ used to capture images‚ and a zoom lever controlling the Nikkor lens.
A mode dial allows you to select various shooting modes‚ such as Auto‚ Scene‚ or Program Auto (P). These modes tailor camera settings to specific shooting conditions. Some models feature a dedicated video record button for quick access to movie recording.
Understanding the function of each control on the top panel is vital for seamless operation. Refer to the manual for detailed explanations of each mode and setting‚ maximizing your photographic potential.
Getting Started: Initial Setup
Begin by inserting the battery and a compatible SD card (not included) following nikon coolpix operating instructions. Then‚ fully charge the battery before first use!
Inserting the Battery
Following these nikon coolpix operating instructions‚ locate the battery compartment on the bottom of your camera. Typically‚ a latch secures the compartment; slide it to the open position. Carefully insert the battery‚ ensuring the contacts align correctly with those inside the compartment – incorrect insertion can prevent power-up or damage the camera.
Press the battery firmly until it clicks into place. Double-check that it’s securely seated. Once the battery is properly installed‚ close and lock the battery compartment latch. The camera should now be ready for charging or initial power-on.
Important Note: Always use a Nikon-approved battery or a compatible replacement to avoid potential issues. Refer to your camera’s specific model documentation for detailed battery specifications and safety guidelines.
Inserting a Memory Card (SD‚ SDHC‚ SDXC)
Following these nikon coolpix operating instructions‚ locate the memory card slot‚ usually found alongside the battery compartment on the camera’s base. Open the card slot cover. Identify the card orientation – SD‚ SDHC‚ and SDXC cards all insert in a specific direction.
Gently insert the memory card into the slot until it clicks into place. Avoid forcing the card; if it doesn’t slide in easily‚ check the orientation. Once securely inserted‚ close the card slot cover. The camera will recognize the card upon power-up.
Important Note: The COOLPIX supports SD‚ SDHC‚ and SDXC formats. A memory card is not included with the camera. Ensure the card is compatible with your camera’s capacity limits for optimal performance.
Charging the Battery
Adhering to these nikon coolpix operating instructions‚ connect the provided USB cable to the camera’s charging port and a USB power adapter or computer. A charging indicator light will illuminate‚ typically red‚ indicating the charging process has begun.
Allow sufficient time for a full charge – this may take several hours depending on the battery’s current charge level. The indicator light will usually change to green (or turn off) when charging is complete.
Important Considerations: Only use the supplied Nikon battery charger and cable to avoid damaging the battery. Do not expose the battery to extreme temperatures or moisture during charging. A fully charged battery ensures optimal camera performance and extended shooting time.

Basic Operations: Taking Your First Pictures
Following these nikon coolpix operating instructions‚ power on the camera‚ compose your shot‚ and press the shutter button halfway to focus‚ then fully to capture!
Powering On/Off the Camera
Following these nikon coolpix operating instructions‚ locating the power button is your first step. Typically‚ it’s found on the top panel of the camera‚ clearly marked with a power symbol. Press this button firmly to turn the camera on; you’ll see the LCD screen illuminate‚ indicating it’s ready for use.
To power off the camera‚ simply press the same power button again. The LCD screen will darken‚ and the camera will enter standby mode‚ conserving battery life. Some models may have a slight delay before fully powering down.
Important Note: Avoid repeatedly turning the camera on and off rapidly‚ as this can potentially strain the internal mechanisms. Allow a few seconds between power cycles for optimal performance and longevity. Always ensure the camera is fully off when storing it or changing batteries.
Focusing the Camera
Understanding these nikon coolpix operating instructions is key to sharp images. The COOLPIX utilizes autofocus (AF) to ensure your subjects are clear. Half-press the shutter button to activate the autofocus system. The camera will automatically detect and focus on the subject within the frame.
You’ll typically see a focus confirmation indicator (often a green square) on the LCD screen when focus is achieved. If the camera struggles to focus‚ ensure sufficient light and that your subject isn’t too close or too far away.
Focus Modes: Explore different focus modes within the menu‚ such as Auto-area AF‚ Center-area AF‚ and Manual Focus‚ to tailor focusing to specific shooting scenarios. Manual focus allows precise control‚ while auto modes offer convenience.
Shutter Button Operation
Mastering nikon coolpix operating instructions begins with understanding the shutter button. This two-step button controls image capture. A gentle half-press activates the autofocus (AF) system‚ locking focus on your subject. The camera will assess the scene’s brightness and adjust exposure settings accordingly.
Once focus is confirmed (indicated by a visual cue on the LCD)‚ fully press the shutter button to capture the photograph. Avoid excessive pressure or movement during this final press to prevent camera shake and ensure a sharp image.
Self-Timer: For self-portraits or group shots‚ utilize the self-timer function. Press the shutter button fully‚ and a countdown will begin before the picture is taken‚ giving you time to join the frame.
Shooting Modes Explained
Explore diverse nikon coolpix operating instructions! Auto mode simplifies shooting‚ while Scene modes optimize settings for portraits‚ landscapes‚ and sports‚ delivering fantastic results.
Auto Mode
Effortless Photography: Auto mode‚ a cornerstone of nikon coolpix operating instructions‚ is designed for simplicity and convenience. It intelligently analyzes the scene and automatically adjusts camera settings – including exposure‚ focus‚ and white balance – to achieve optimal results. This makes it perfect for beginners or situations where quick‚ hassle-free shooting is desired.
In Auto mode‚ you can simply point and shoot‚ trusting the camera to handle the technical aspects. The camera prioritizes ease of use‚ ensuring well-exposed and sharply focused images in a variety of lighting conditions. While offering minimal manual control‚ Auto mode provides a solid foundation for capturing memorable moments without needing extensive photographic knowledge. It’s an excellent starting point for exploring your Nikon COOLPIX’s capabilities.
Remember to review your images on the LCD screen to ensure they meet your expectations‚ and consider exploring other shooting modes as you become more comfortable with the camera.
Scene Modes (Portrait‚ Landscape‚ Sports‚ etc.)
Understanding nikon coolpix operating instructions extends to utilizing Scene Modes‚ pre-programmed settings optimized for specific shooting scenarios. These modes take the guesswork out of photography‚ delivering enhanced results tailored to the subject. Portrait mode‚ for example‚ softens backgrounds and emphasizes facial features‚ while Landscape mode prioritizes sharpness and vibrant colors for expansive views.
Sports mode employs a faster shutter speed to freeze motion‚ ideal for capturing action shots. Night Portrait mode balances flash with a slower shutter speed‚ illuminating subjects while preserving background details. Other common scene modes include Macro for close-up photography‚ and Beach/Snow for accurate color rendition in challenging lighting.
Experimenting with these modes allows you to achieve professional-looking results without manual adjustments‚ enhancing your creative control and photographic outcomes.
Program Auto Mode (P)
Delving into nikon coolpix operating instructions reveals Program Auto (P) mode‚ a versatile setting bridging automatic and manual control. Unlike full Auto mode‚ ‘P’ allows you to adjust certain settings – like ISO sensitivity‚ white balance‚ and exposure compensation – while the camera automatically manages aperture and shutter speed for optimal exposure.
This mode is perfect for photographers wanting more creative input without the complexity of fully manual settings. You retain control over key parameters influencing image appearance‚ while the camera handles the technical aspects. It’s an excellent stepping stone towards mastering manual photography.
Program Auto offers a balance between convenience and control‚ enabling you to fine-tune images to your preferences while still benefiting from the camera’s intelligent automation.
Understanding the Menu System
Navigating the menu is crucial for nikon coolpix operating instructions; it unlocks customization options for image quality‚ ISO‚ and various camera settings for optimal results.
Navigating the Menu
Accessing the menu on your Nikon COOLPIX is typically done via a dedicated ‘Menu’ button on the camera body. Pressing this button brings up the main menu screen on the LCD display‚ presenting a series of tabs or categories. Use the directional pad (or touchscreen‚ if equipped) to navigate between these tabs – often labeled ‘Shooting‚’ ‘Setup‚’ ‘Playback‚’ and others.
Within each tab‚ you’ll find a list of settings. Again‚ use the directional pad to highlight the desired setting‚ and then press the ‘OK’ or ‘Set’ button to modify it. Many settings offer multiple options‚ which you can scroll through using the directional pad. To return to the previous menu level‚ press the ‘Menu’ button again.
Familiarize yourself with the menu structure; understanding how settings are organized is key to efficient nikon coolpix operating instructions and customizing your camera to your preferences. Don’t be afraid to explore!
Key Menu Settings: Image Quality & Size
Within the ‘Shooting’ menu‚ locate the ‘Image Quality’ and ‘Image Size’ settings – crucial for controlling your photos. Image Quality typically offers options like ‘Auto‚’ ‘Fine‚’ ‘Normal‚’ and ‘Basic.’ ‘Fine’ delivers the highest quality with larger file sizes‚ ideal for printing or editing. ‘Basic’ produces smaller files‚ suitable for sharing online but with reduced detail.
Image Size determines the resolution of your photos in megapixels (MP). Higher MP settings capture more detail‚ allowing for larger prints and cropping. Lower MP settings create smaller files‚ saving storage space. Consider your intended use when selecting a size.
Understanding these nikon coolpix operating instructions allows you to balance image quality with storage capacity. Experiment to find the settings that best suit your needs and shooting style.
Key Menu Settings: ISO Sensitivity
ISO Sensitivity‚ found within the camera’s ‘Shooting’ menu‚ controls the camera’s sensitivity to light. Lower ISO settings (e.g.‚ ISO 100‚ 200) are best for bright conditions‚ producing cleaner images with less noise. Higher ISO settings (e.g.‚ ISO 800‚ 1600‚ 3200) are useful in low-light situations‚ allowing for faster shutter speeds to prevent blur.
However‚ increasing ISO also introduces more digital noise‚ which can degrade image quality. The ‘Auto ISO’ setting lets the camera automatically adjust ISO based on the lighting conditions – a convenient option for general shooting.
Mastering these nikon coolpix operating instructions regarding ISO is vital for capturing clear‚ well-exposed photos in various lighting environments. Experiment to find the optimal balance between brightness and noise.

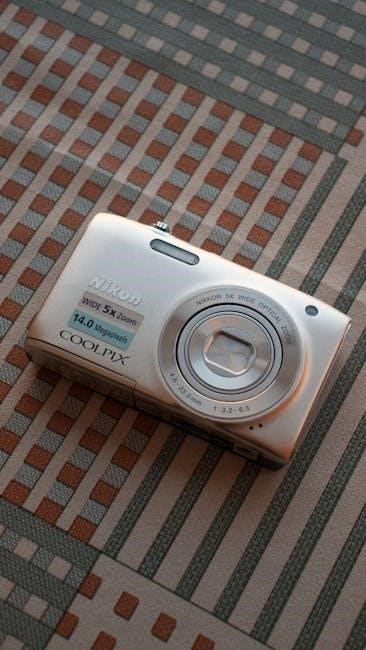
Zoom Functionality & Nikkor Lens Details
Nikkor lenses offer both optical and digital zoom; optical zoom maintains image quality‚ while digital zoom enlarges pixels‚ potentially reducing clarity.
Understanding lens specifications‚ like 6.3-31.4mm‚ is key to nikon coolpix operating instructions.
Optical Zoom vs. Digital Zoom
Understanding the difference between optical and digital zoom is crucial for effective nikon coolpix operating instructions. Optical zoom utilizes the physical lens elements to magnify the image‚ maintaining excellent image quality throughout the zoom range. This means the image remains sharp and detailed‚ even at maximum zoom.
Conversely‚ digital zoom simply crops and enlarges the image using software algorithms. While it increases the apparent size of the subject‚ it doesn’t add any new detail. Consequently‚ digital zoom often results in a loss of image quality‚ appearing pixelated or blurry‚ especially at higher zoom levels.
Therefore‚ prioritize using optical zoom whenever possible to achieve the desired framing without compromising image clarity. Digital zoom can be useful in situations where you need a little extra reach‚ but be mindful of the potential for reduced image quality. Always check your camera’s settings to understand the zoom capabilities of your Nikkor lens.
Understanding Lens Specifications (e.g.‚ 6.3-31.4mm)
Decoding lens specifications is key to nikon coolpix operating instructions. A specification like “6.3-31.4mm” represents the zoom range of the Nikkor lens. The first number (6.3mm) indicates the widest angle‚ ideal for landscapes or group photos. The second number (31.4mm) signifies the telephoto end‚ perfect for zooming in on distant subjects.
These numbers aren’t direct equivalents to traditional 35mm film camera lenses‚ but they provide a useful comparison. A smaller number means a wider field of view‚ while a larger number offers greater magnification. The “1:2.9-5.0” refers to the lens’s maximum aperture – a lower number indicates a wider aperture‚ allowing more light to enter the camera.
Understanding these specifications helps you choose the appropriate zoom setting and aperture for various shooting scenarios‚ ultimately improving your image quality and creative control.
Playback Mode: Viewing Your Photos & Videos
Accessing playback mode lets you review captured images and videos on the LCD screen‚ delete unwanted files‚ and enjoy your nikon coolpix operating instructions.
Displaying Images on the LCD Screen
Viewing your photos is simple! After entering Playback Mode‚ your Nikon Coolpix will display the most recently captured image on the LCD screen. Use the zoom control to magnify images for detailed inspection‚ allowing you to assess sharpness and composition.
The directional pad or buttons navigate between images and videos. Pressing the ‘OK’ or shutter-release button halfway often toggles display information‚ such as shooting settings‚ date‚ and time.
Explore the playback menu for additional options like slideshows‚ histogram display (for exposure evaluation)‚ and image rotation. Some models offer face detection during playback‚ quickly locating and zooming in on people within your photos. Remember to consult your specific nikon coolpix operating instructions for detailed button mappings and menu navigation.
Deleting Images
Deleting unwanted photos and videos is straightforward in Playback Mode. First‚ select the image you wish to remove using the directional pad or zoom controls. Then‚ access the delete function‚ typically represented by a trash can icon‚ through the menu or a dedicated button.
A confirmation dialog will appear – carefully review before confirming deletion‚ as this action is usually irreversible! You can often select multiple images for batch deletion‚ saving time when clearing out a large number of files.
Refer to your nikon coolpix operating instructions for specific menu locations and options. Some cameras offer ‘Protect’ features to prevent accidental deletion of important images. Always double-check the selected files before confirming deletion to avoid losing cherished memories.
Connecting to a Computer & Transferring Files
Utilize the USB cable to connect your Nikon COOLPIX to your computer‚ enabling seamless file transfer and utilizing ViewNX-i software for organization.
Using USB Cable
Connecting via USB is a straightforward method for transferring your precious photos and videos from your Nikon COOLPIX to a computer for editing‚ storage‚ and sharing. First‚ ensure your camera is powered off. Then‚ connect the smaller end of the USB cable into the camera’s USB port‚ typically found under a protective cover.
Next‚ plug the larger USB end into a compatible USB port on your computer. Power on the camera; it should automatically detect the connection and may display options on the LCD screen. Select the appropriate mode – often labeled “MTP” or “PTP” – to allow file transfer.
Your computer should recognize the camera as a removable drive. You can then browse the camera’s internal storage or memory card to copy desired files. Remember to safely eject the camera from your computer before disconnecting the USB cable to prevent data corruption.
ViewNX-i Software Download & Installation
ViewNX-i is Nikon’s powerful‚ yet free‚ software designed to enhance your COOLPIX experience. To begin‚ visit Nikon’s official Download Center – easily found through a web search for “Nikon ViewNX-i download”. Ensure you select the version compatible with your computer’s operating system (Windows or macOS).
Once downloaded‚ double-click the installation file and follow the on-screen prompts. The installation process is generally straightforward‚ requiring you to accept the license agreement and choose an installation location.
After installation‚ launch ViewNX-i. This software allows you to efficiently transfer images and movies‚ organize them into albums‚ and perform basic editing tasks. It also supports RAW file processing for greater control over your images. Explore the software’s features to unlock the full potential of your Nikon COOLPIX!
Lost your Nikon Coolpix manual? Find easy-to-follow operating instructions & troubleshooting tips right here! Unlock all your camera’s features. #NikonCoolpix